The plugin installs - by user choice - through the DNGDeblur installer.
Note that this plugin is slightly beta. It's not tested on any other system than my own, and it was only tested with Lightroom 4 and 5. Currently I cannot guarantee proper functioning on earlier versions of Lightroom.
The plugin does a few simple things.
- Starts up DNGDeblur with the color DNG or JPG from Lightroom selected
- Saves the deblurred copy - after conversion - in the same folder as the original DNG or JPEG.
- Imports the copy into the catalog
- Selects the copy in Lightroom
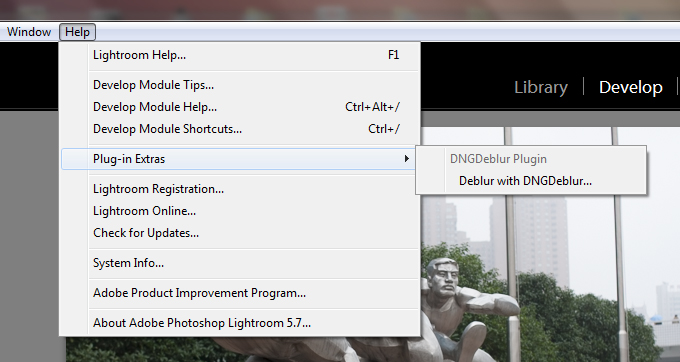
After installing, start Lightroom. Check the Help menu. There should be an entry called 'Plug-in Extras -> Deblur with DNGDeblur...'.
If you do not see this entry, check your plugins.
Go to the 'File' menu and select 'Plugin Manager'.
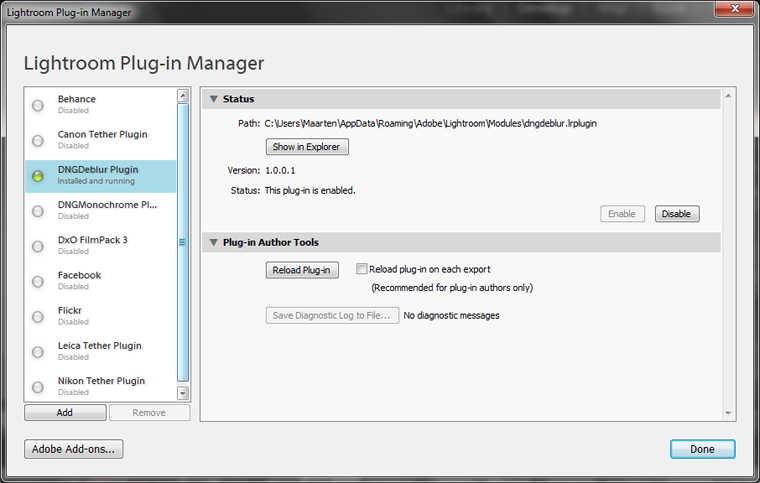
You should see the DNGDeblur Plugin in the list on the left, with a green bullet. If the entry is there but the bullet is orange or red, there's a problem with the functionality of the plugin. Try the 'Reload' button. If the plugin isn't visible at all, there was a problem installing it. Try reinstalling through the DNGDeblur installer and make sure the checkmark in front of the plugin is turned on.
If you have any trouble with the plugin - e.g. Lightroom starts to behave erratically - either uninstall it (see down this page) or turn it off through the Plugin Manager (see screenshot above, click the Disable button). Then restart Lightroom.
Using the plugin
After selecting the DNG or JPG in Lightroom, you start up DNGDeblur by going through the help menu. Select 'Plug-in Extras -> 'Deblur with DNGDeblur'. DNGDeblur is started with the selected photo (you can't choose any other photos within DNGDeblur). Note that the photo needs to be a DNG or a JPEG. Selecting TIFF or any other format will not work and will lead to errors in DNGDeblur.
Within DNGDeblur deblur the selected DNG or JPG, the usual way.
After producing your final result, the deblurred copy is written to the same folder as your original DNG or JPG. It will then be imported into the Lightroom catalog, as an 'Add' (no other copies will be made, and of course your original DNG or JPG will be untouched).
It basically means that the deblurred version will be physically in the same folder as the original version and added automatically to the open catalog. It greatly simplifies deblurring DNGs or JPGs if your workflow is based on Lightroom and it keeps the deblurred version and the original version together.
Note that when you're working on a Last Imported batch of photo's, the deblurred DNG or JPG will be imported but won't show up. You have to select the actual folder via the Library module to see the deblurred copy.
DNGDeblur contains a safeguard, which make it impossible to overwrite the original DNG. If for any reason the filename of the original would be the same as the deblurred copy (which in itself is impossible, only in case of severe bugs), DNGDeblur will refuse to save the copy.
Installation folder and uninstalling
On Windows 7, the plugin is installed in
"C:\Users\<user>\AppData\Roaming\Adobe\Lightroom\Modules".
If you install a new version of Lightroom, e.g. going from 4 to 5, you do not have to reinstall the plugin. If you installed it under Lightroom 4, it will be there automatically in Lightroom 5.
If you want to get rid of it, either uninstall DNGDeblur the official way, then reinstall without the plugin selected, or simply throw away the dngdeblur.lrplugin folder found in the Modules folder.
Do not edit or change any of the files within the dngdeblur.lrplugin folder (obviously).
Click here to go back to the main page.
See also the blog.