Load a file you want to remap and select it in the list by clicking on it, so the line turns blue. You'll see the 'Remap selected file...' button on the left become available. Note that remapping does not work on multiple files, so select only one if you have more files in the list.
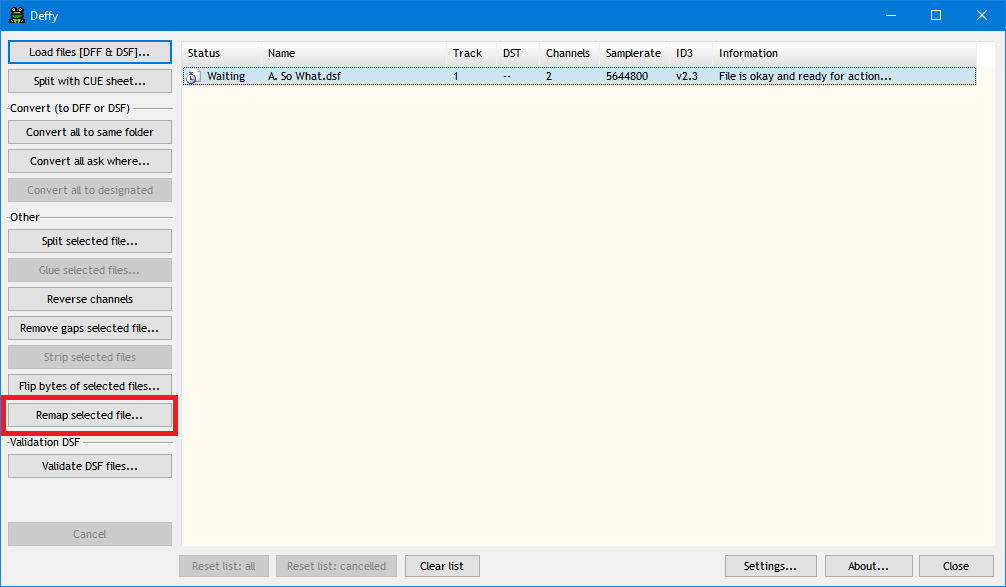
After startup, loading and selecting a file, click the 'Remap selected file...' button... (version 6.0.0)
The 'Channel remapping' window opens, showing on the left side the data in your file, split per channel (Front Left, Front Right, Center, Surround Left, Surround Right, LFE) plus a silence block, and on the right side a simulated speaker setup (see the labels at the bottom of each column) with a more intuitive order, more or less how they would be positioned in a room (with the LFE on the side). Note that I'm following the DFF naming convention, which means the rear speakers are called 'surround'. As you can see, this stereo file has music assigned to the two front speakers (teal colored) and the data from the channels is mentioned at the top (FL data and FR data). The other speakers show as 'empty', which means: no data assigned and currently they don't represent a channel = unused).
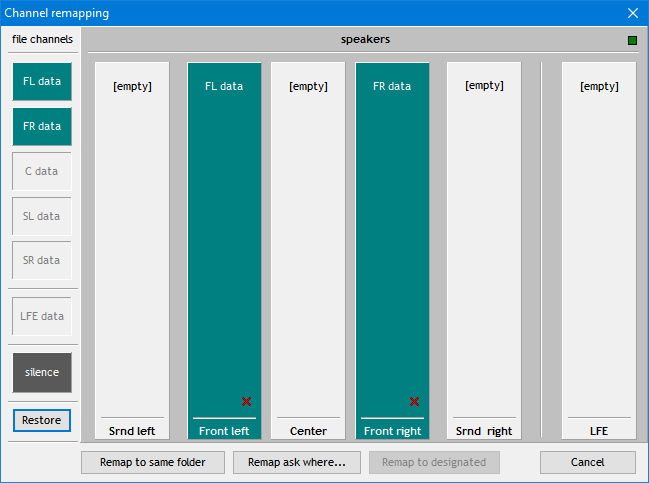
The remap window is opened with all the data from the file showing as channels on the left and a speaker setup on the right... clearly this is a two channel stereo file with Front Left data on the front left speaker and Front Right data on the front right speaker... (version 6.0.0)
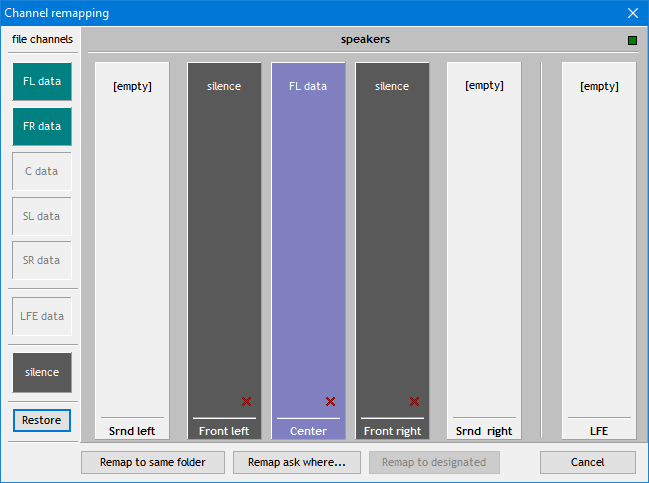
The idea is to move data from the left to the desired speakers. There's two ways to do that: grab a green data block on the left (or the silence block) and drag it to the speaker, then drop it. Or you can select a data block by clicking on it (shown in the next screenshots) and then click on the desired speaker. In this example I'm using method two (the clicking) to fill the center speaker with the Front Left data.
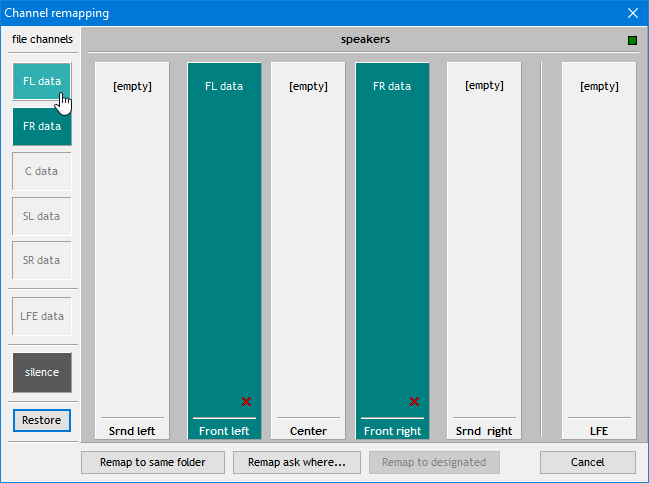
Selecting the Front Left data by clicking on it... (version 6.0.0)
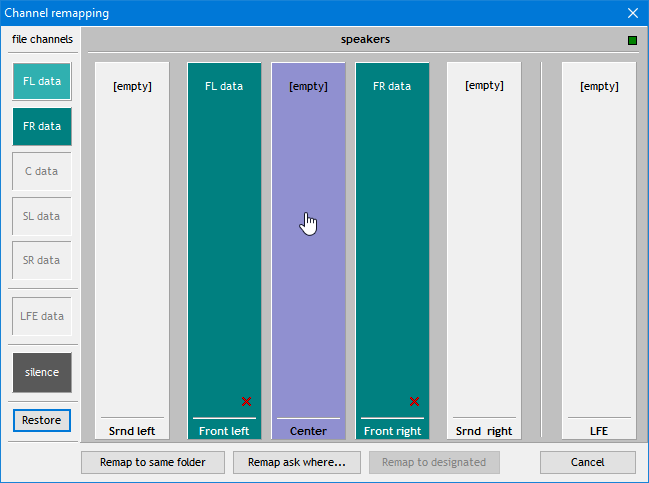
... moving over the center speaker with the mouse... notice how the speaker turns purple, indicating the data to be assigned does not originally belong there (else it would turn teal)... (version 6.0.0)

... and clicking on the center speaker to actually assign the Front Left data, with the top label changing from '[empty]' to 'FL data' (version 6.0.0)
Some other functionality to point out: click on the little red cross to empty a speaker.

Clicking the button with the cross to empty a speaker... (version 6.0.0)
Sometimes you will have to use silence if you want to use a speaker further down the chain. For the silence block it works the same: either drag it to the speaker or click on the silence block to select it and then on the speaker you want to fill with silence. Note the difference: [empty] means the channel is not used at all. 'Silence' means the channel is used but the content that's played can't be heard (a silence byte is used to fill up the channel). Say you want to use only the center speaker. Most players do not allow only one channel to be played on the center speaker. So what you can then do: create a three channel file, put silence on the front left and front right speakers, and only put music on the center speaker. Be aware though: the players I tested did NOT adhere to the meta data of the DFF and DSF file. They seemed to do their own thing with channel assignments, not compliant to the DFF and DSF specs. So although Deffy produces what it should, I cannot guarantee your player will do what you expect it to do.
Three channel setup with the front left and front right speaker silenced... (version 6.0.0)
If you want to restore the original data on an empty speaker click the button with the up-arrow (only the speakers that had original data have this button). And if you want to start over click the 'Restore' button under the silence-data block.
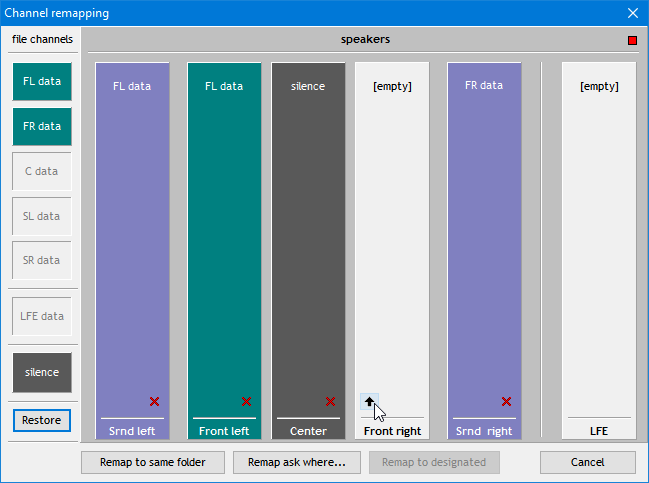
Click the up arrow button to restore the FR data on this speaker... (version 6.0.0)
Note in all the examples the little block top right. That one indicates if the current combination is valid.
Once you're satisfied, click one of the 'Remap' buttons at the bottom, the Remapping window will close, and your file will be created. You can see the progress in the main window. If you created a combination that's not allowed you will be notified with some explanation on how to solve it.
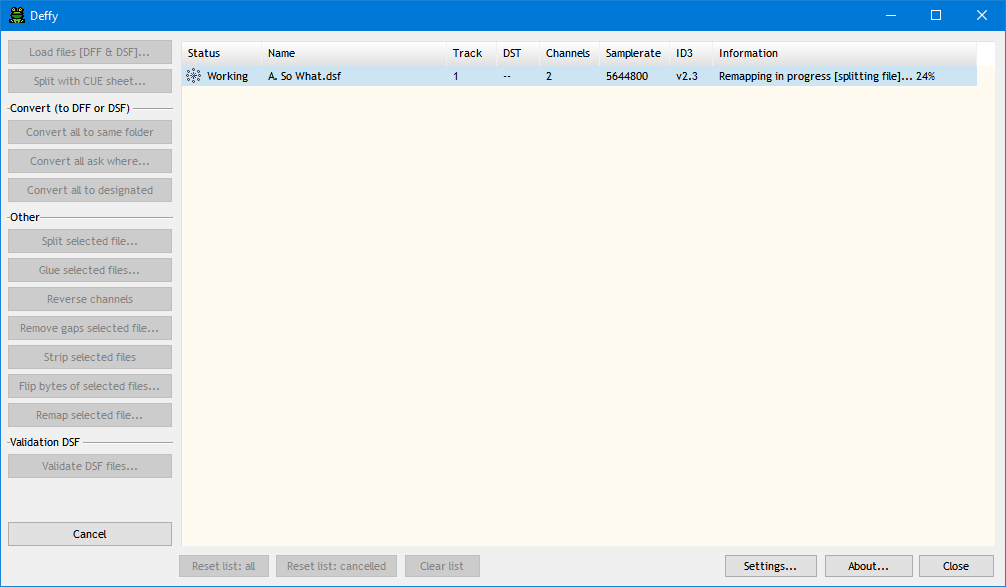
Remapping in progress... (version 6.0.0)